Laying the Foundation: Inside Our Barndo Slab Pour in Damon TX
There's a moment on every build where abstract plans drawn on paper have to become real things in the ground. For a barndominium, that moment is the concrete slab. Get it right, and every wall, every post, every door frame has a solid, level, permanent place to call home. Get it wrong, and you'll be chasing problems for decades. We walked every inch of our slab the morning before the pour — tape measure in hand, camera rolling — and here's exactly what we found and why it matters.

Why the Slab Is Everything
A barndominium is, at its core, a steel building married to a residential interior. That hybrid nature puts unique demands on the foundation. Unlike a standard wood-framed house that sits on a stem wall, most barndominiums are built on a monolithic slab — a single continuous pour of concrete that forms both the footing and the floor in one unified structure.
That means the slab has to accomplish several things at once: bear the massive point loads of steel columns, resist lateral movement from wind and soil, act as a moisture barrier, and deliver a flat, smooth floor surface for living. No pressure, right?
The Rebar Grid: Strength You'll Never See Again
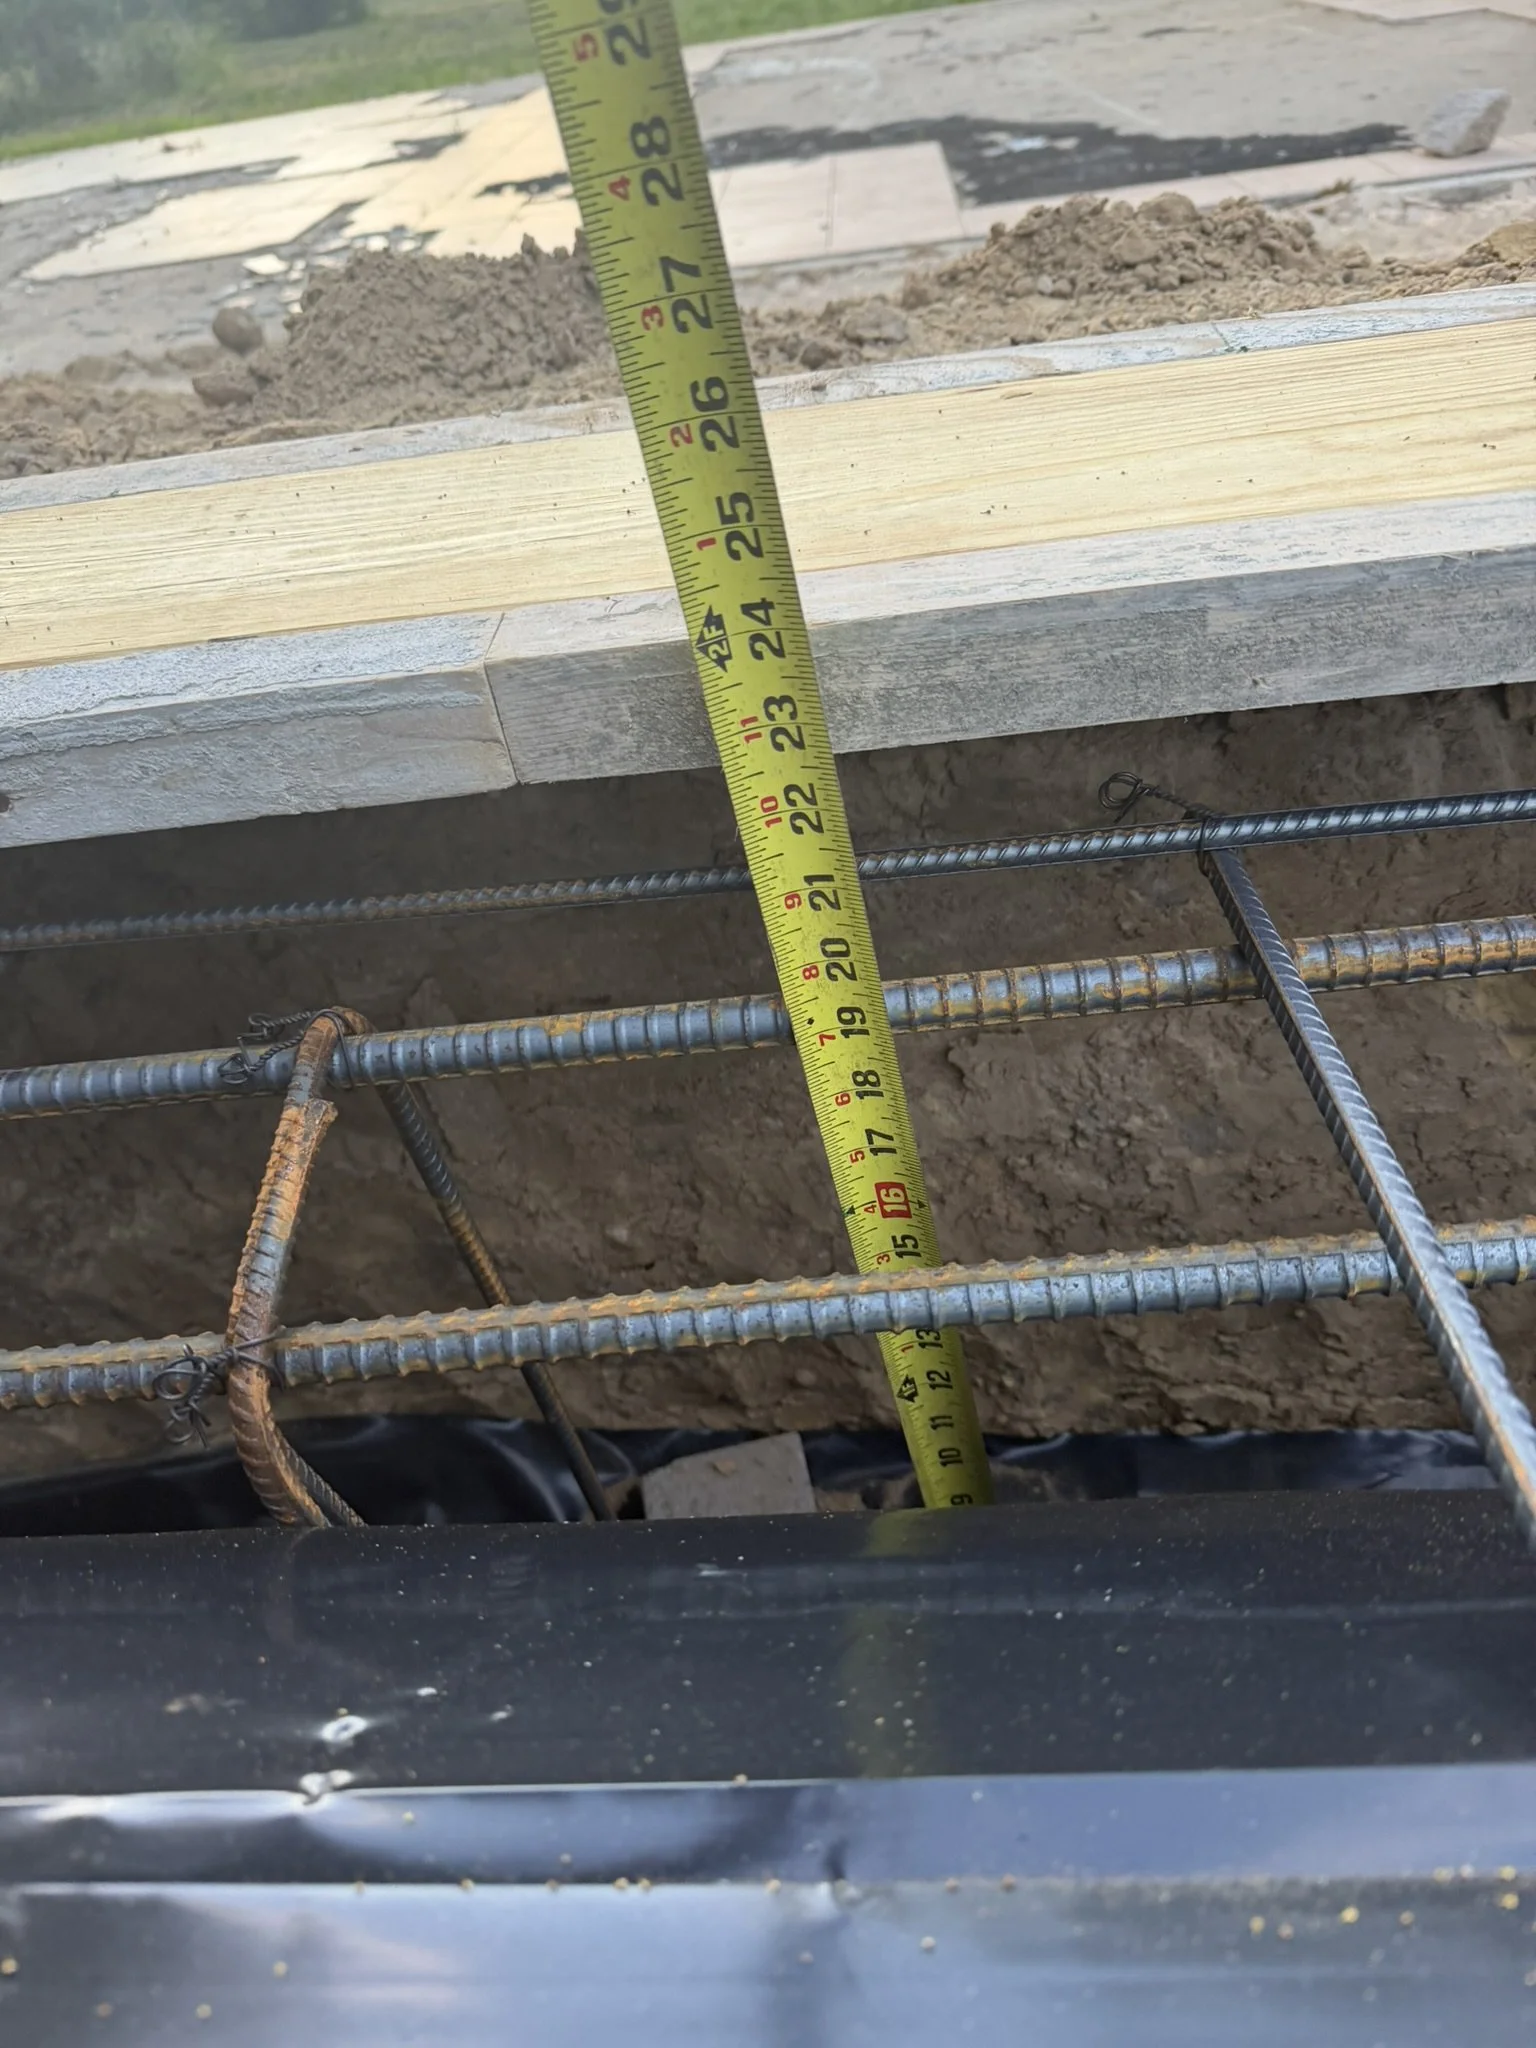
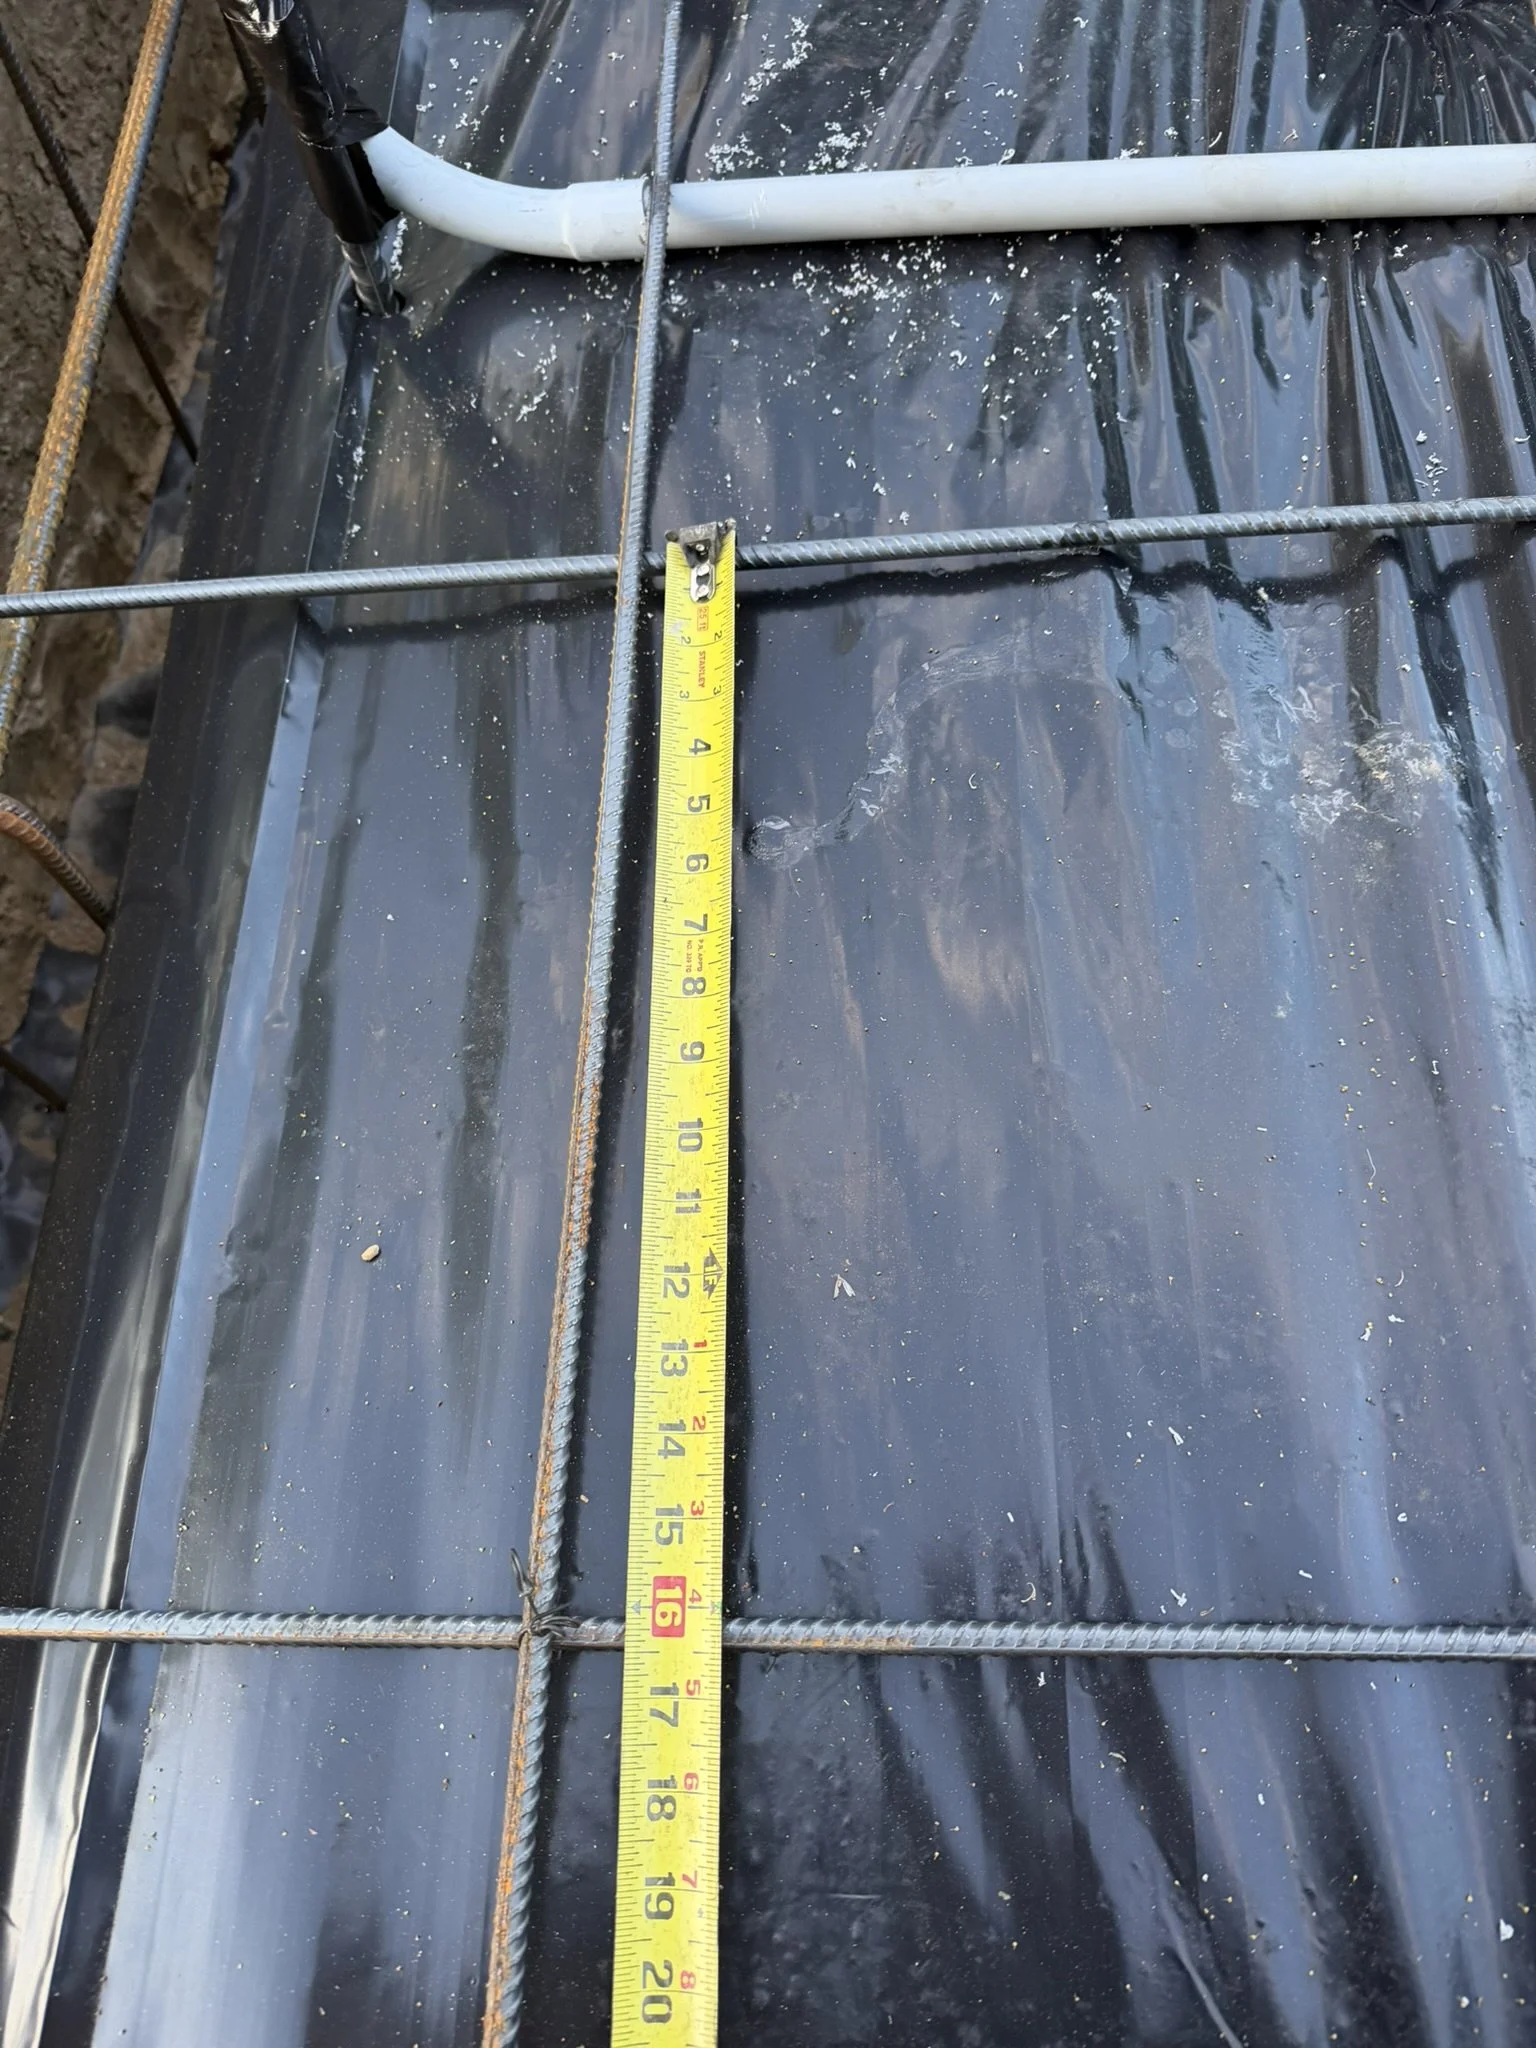
Once concrete goes in, nobody will ever see the rebar — which is exactly why the pre-pour inspection matters so much. Our crew laid a grid of #5 rebar (that's 5/8-inch diameter deformed steel bar) across the entire slab area and throughout the deepened perimeter beam. Measuring confirmed the grid runs at 16 inches on center in both directions, which matches our engineer's spec for the soil conditions on our site.
What you can see clearly in the photos is the difference between the interior slab section and the perimeter beam. The beam runs around the entire footprint of the building and drops considerably deeper than the interior floor — in this case about 24 inches from the top of the form. That thickened, heavily reinforced perimeter is what carries the steel column loads and keeps the edges of the slab from cracking and shifting over time.
“The rebar isn't holding the concrete together — it's holding it in place when the ground decides to move."
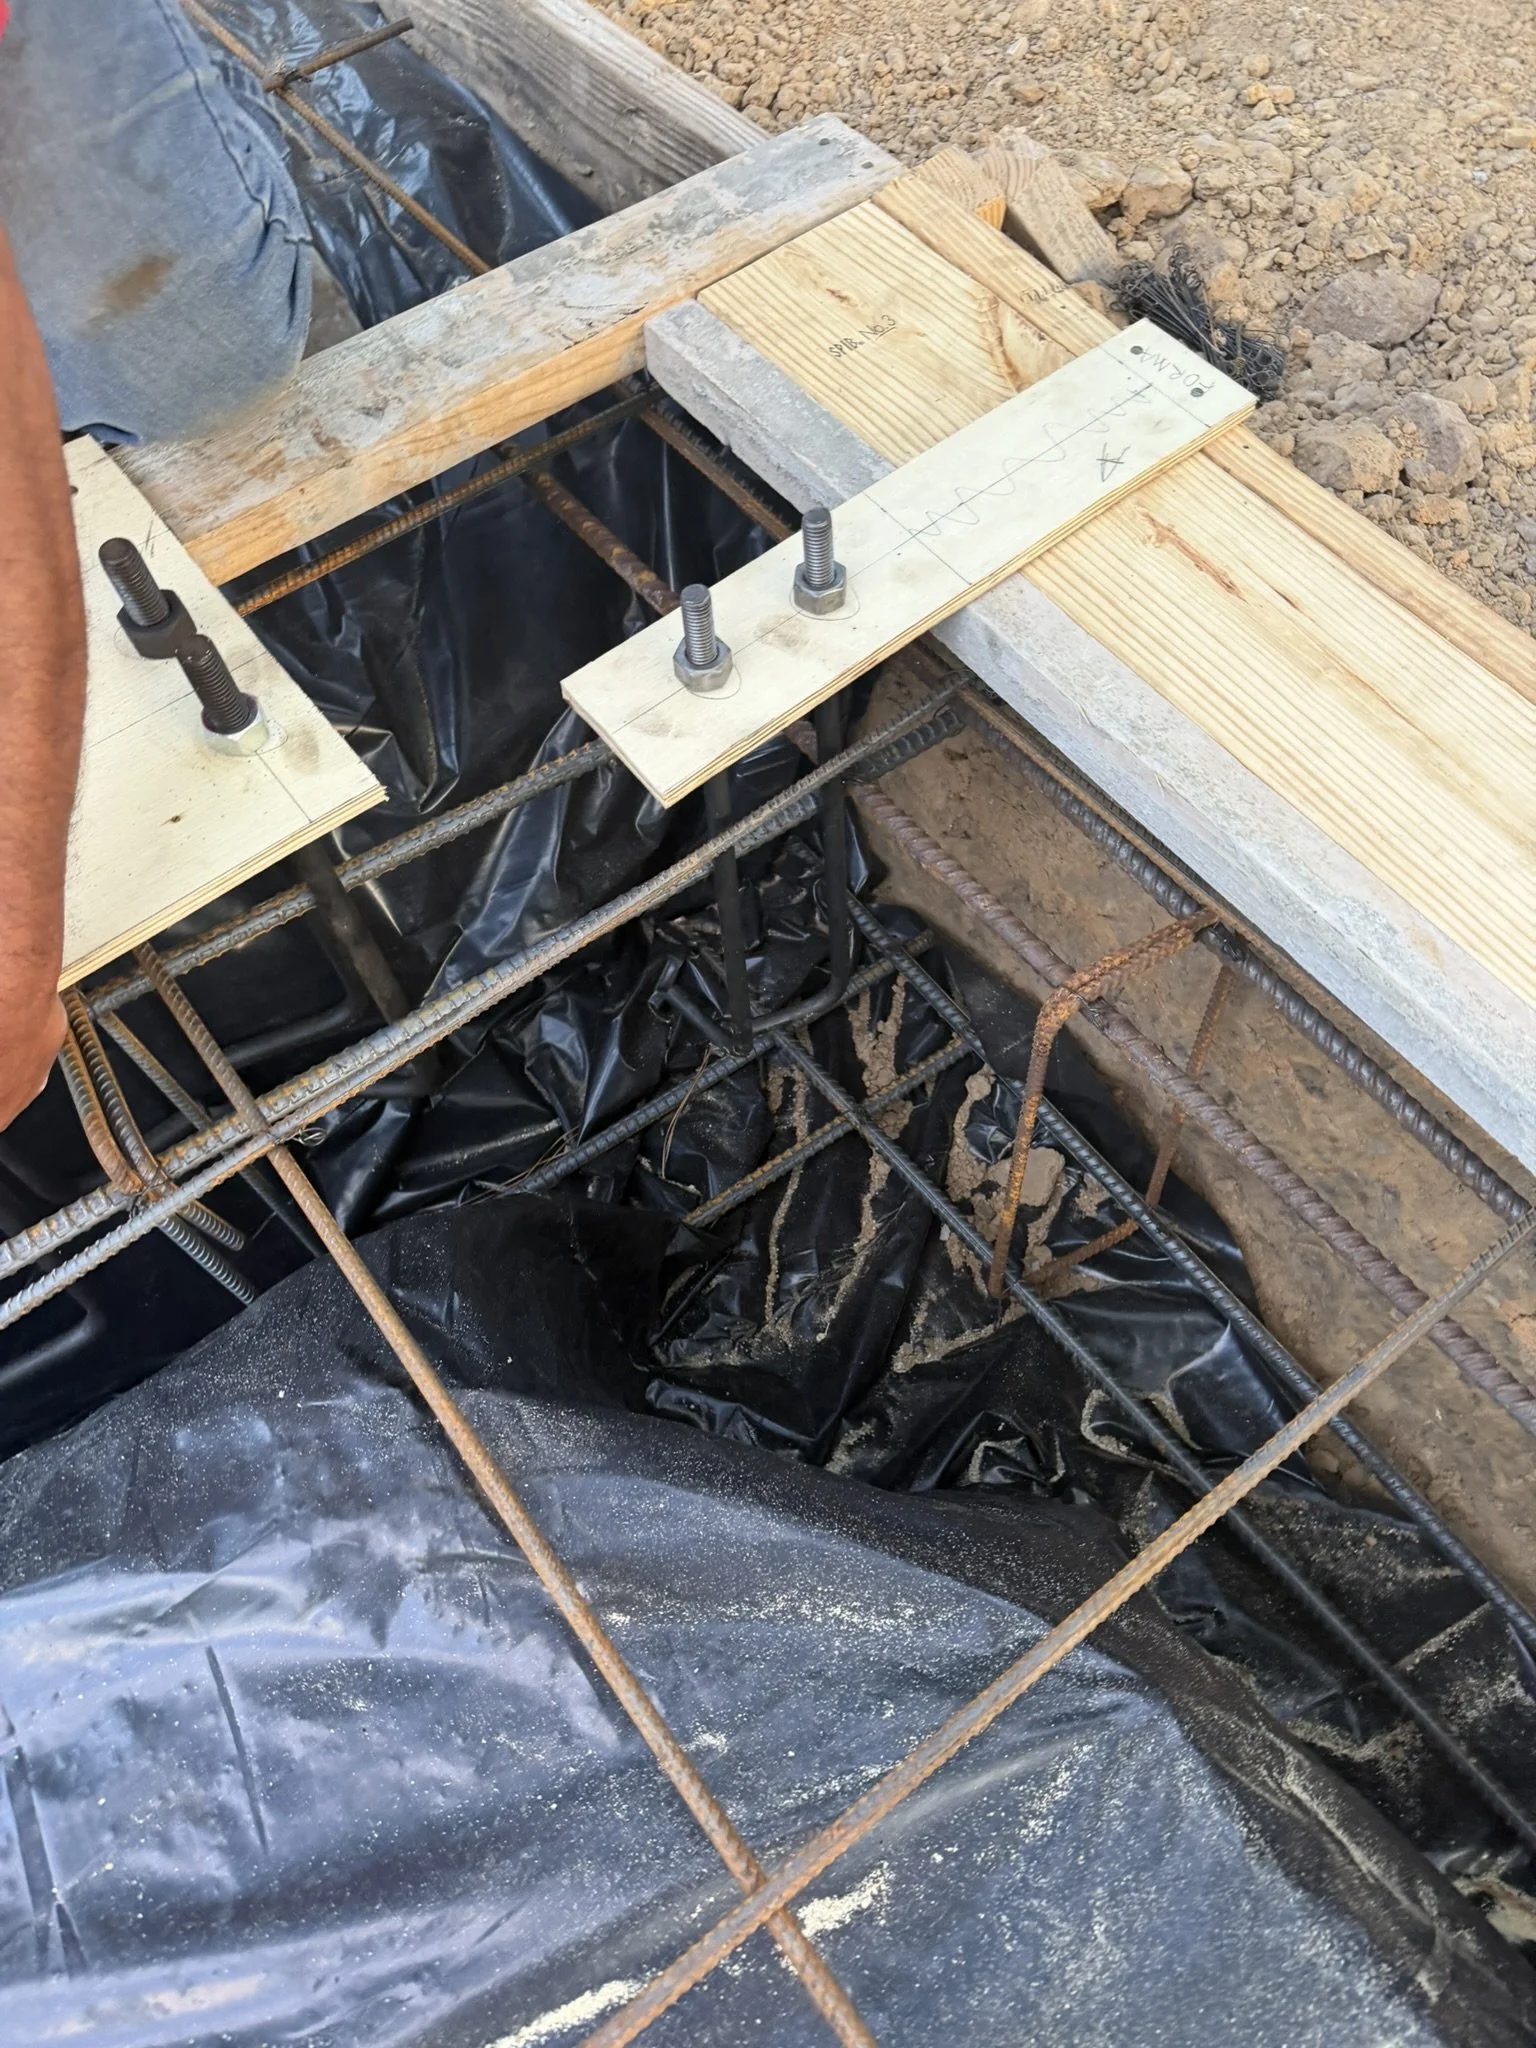
One detail worth noting: you can see rebar chairs (small plastic or concrete spacers) lifting the steel off the vapor barrier. This is critical. Rebar that sits directly on the plastic provides zero reinforcement value once the concrete cures — you need that steel floating in the middle of the concrete mass, not pinned against the bottom.
The Vapor Barrier: Your Floor's First Line of Defense
Beneath all that rebar lies a black 6-mil poly sheeting — the vapor barrier. In a barndominium that will be conditioned living space, this layer does serious work. Ground moisture migrating upward through concrete is one of the most common causes of flooring failures, musty smells, and long-term damage to anything you set on that slab.
The photos show the barrier laid flat across the interior, with the rebar grid sitting on top. At the perimeter beams, the plastic drapes down into the trench and back up. You'll notice some wrinkling — that's normal and expected. The goal is continuous coverage without tears, not a perfectly flat sheet.

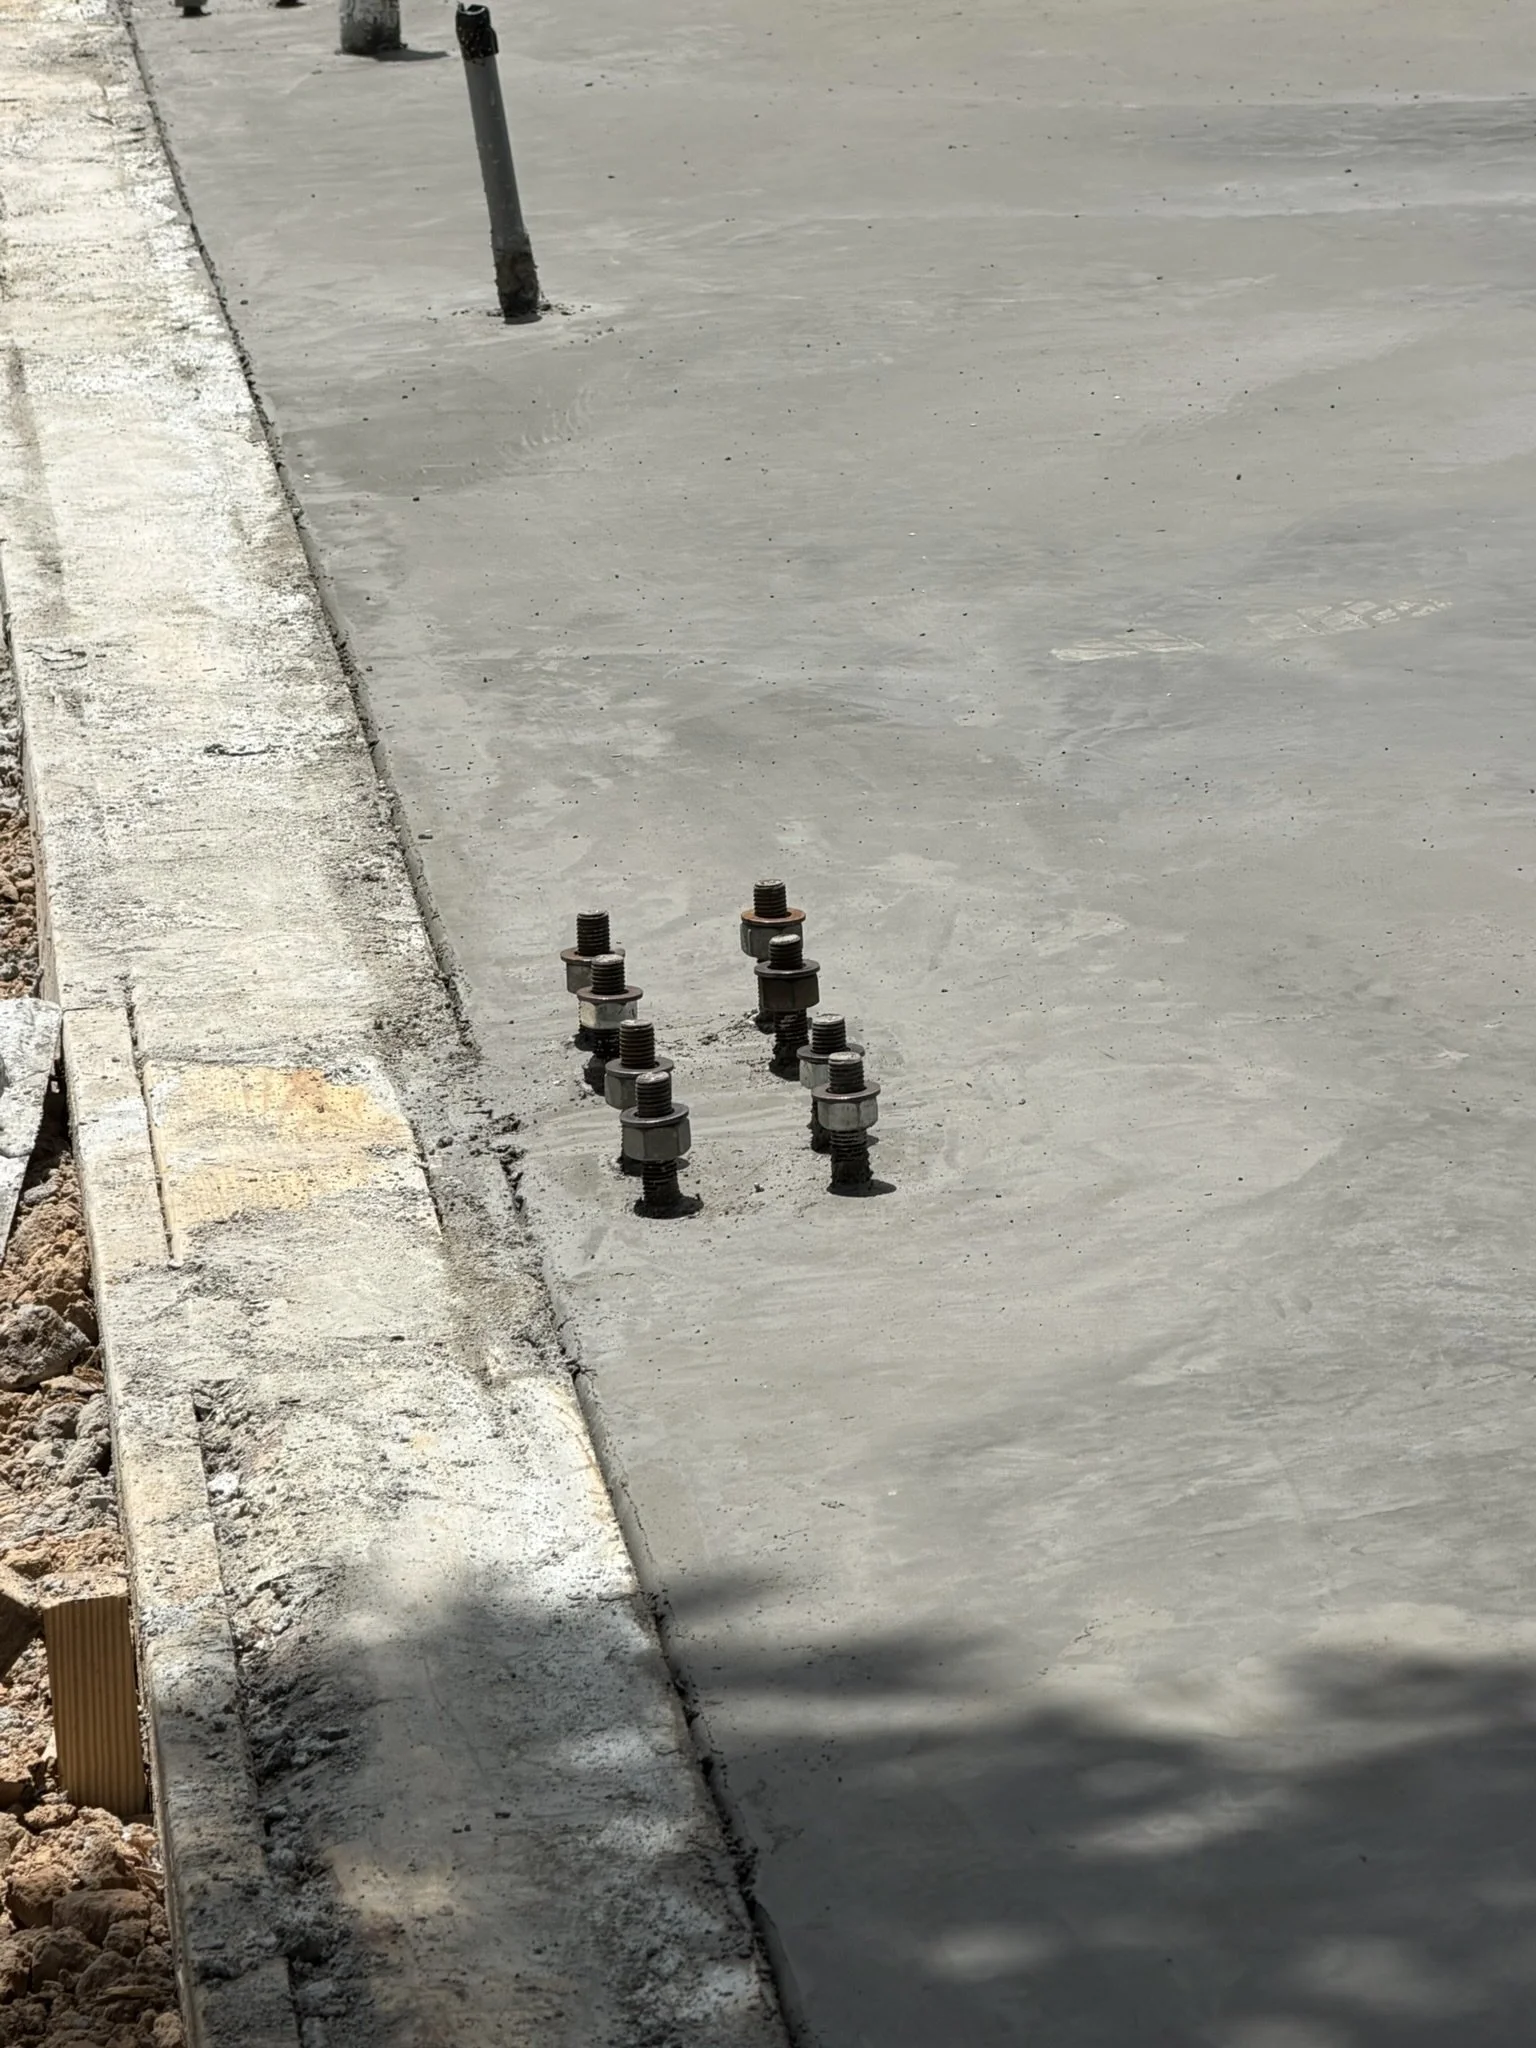
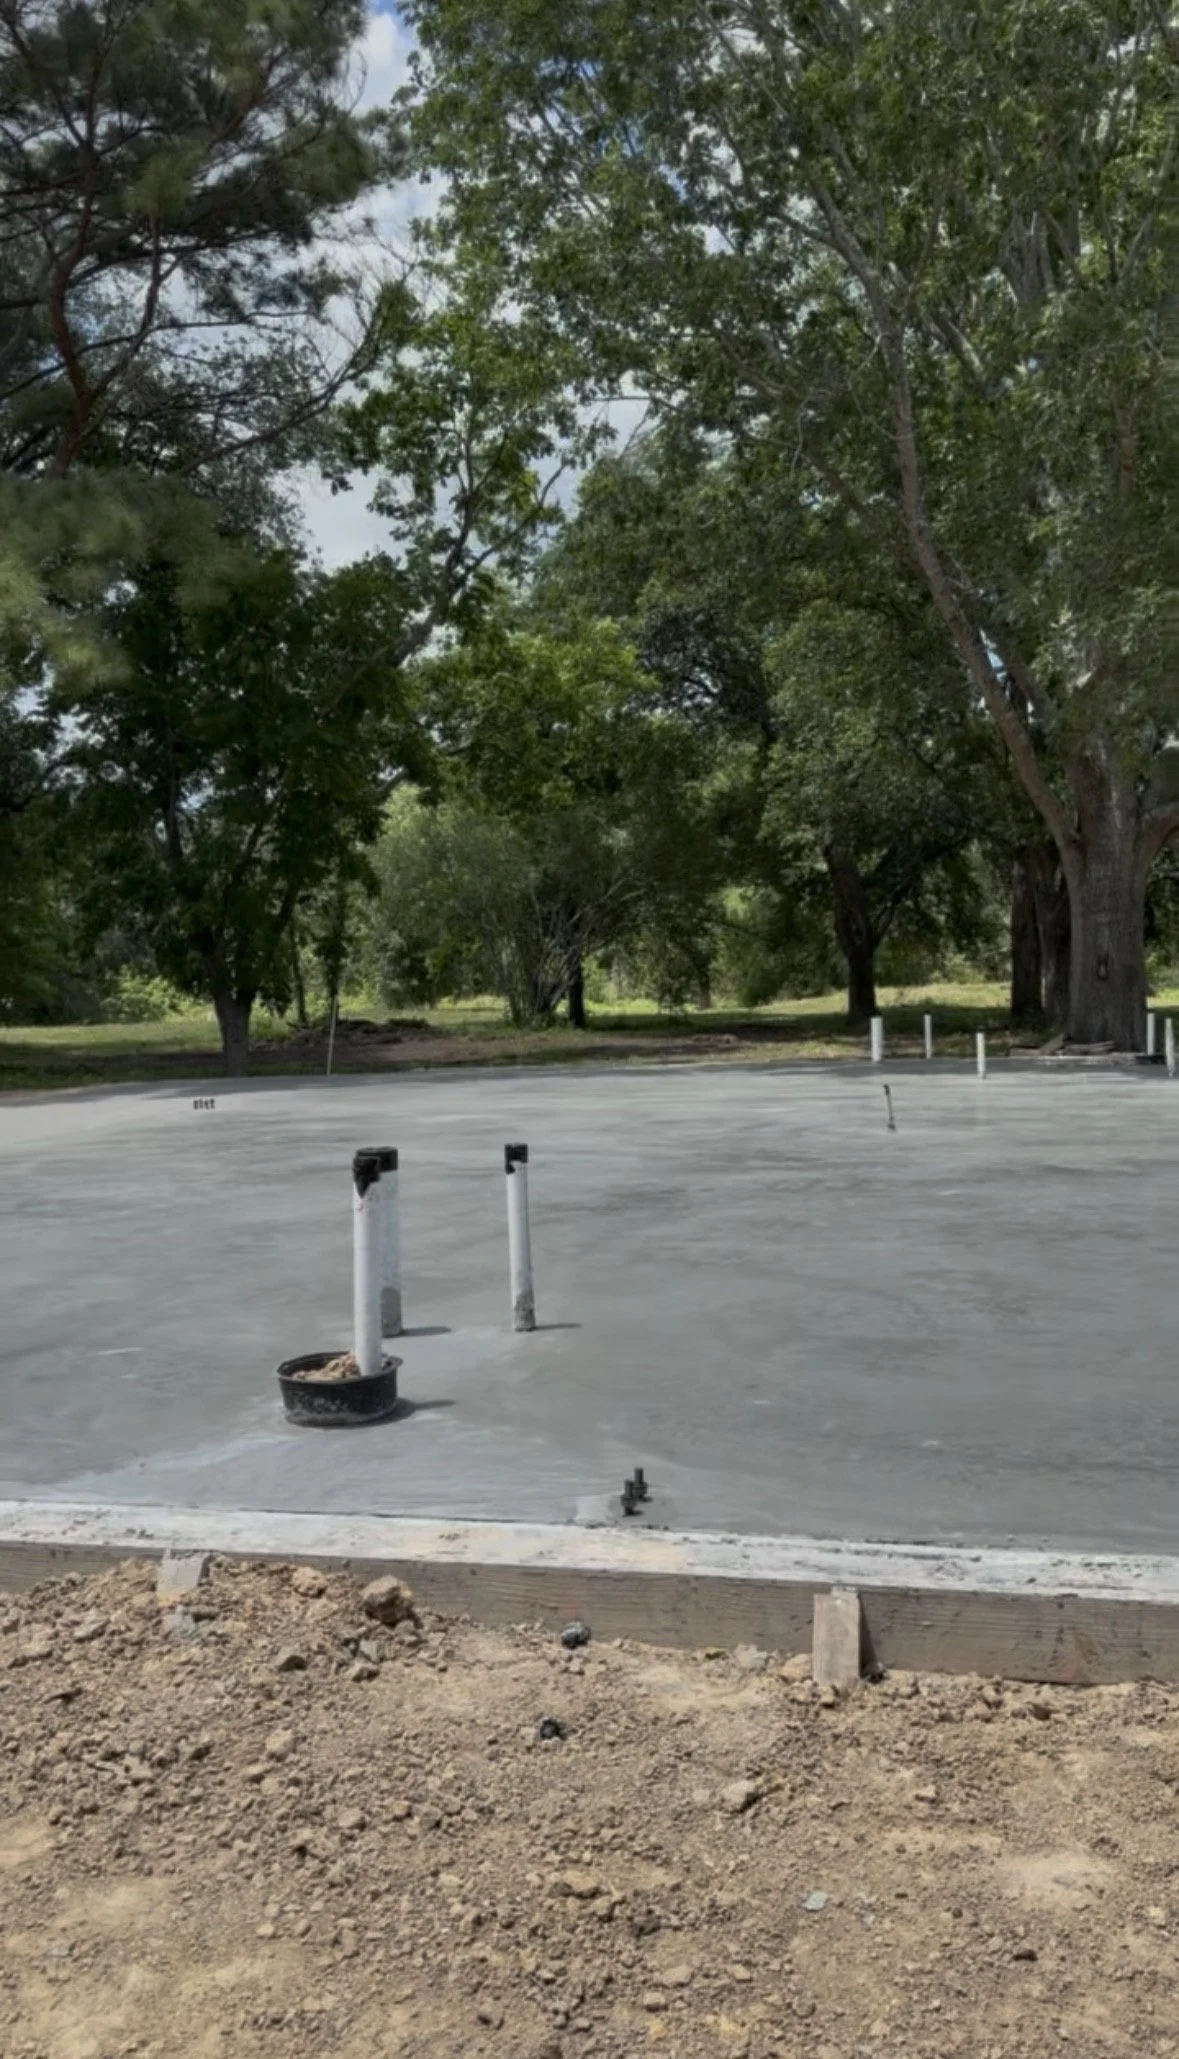
Anchor Bolts: Where Steel Meets Concrete
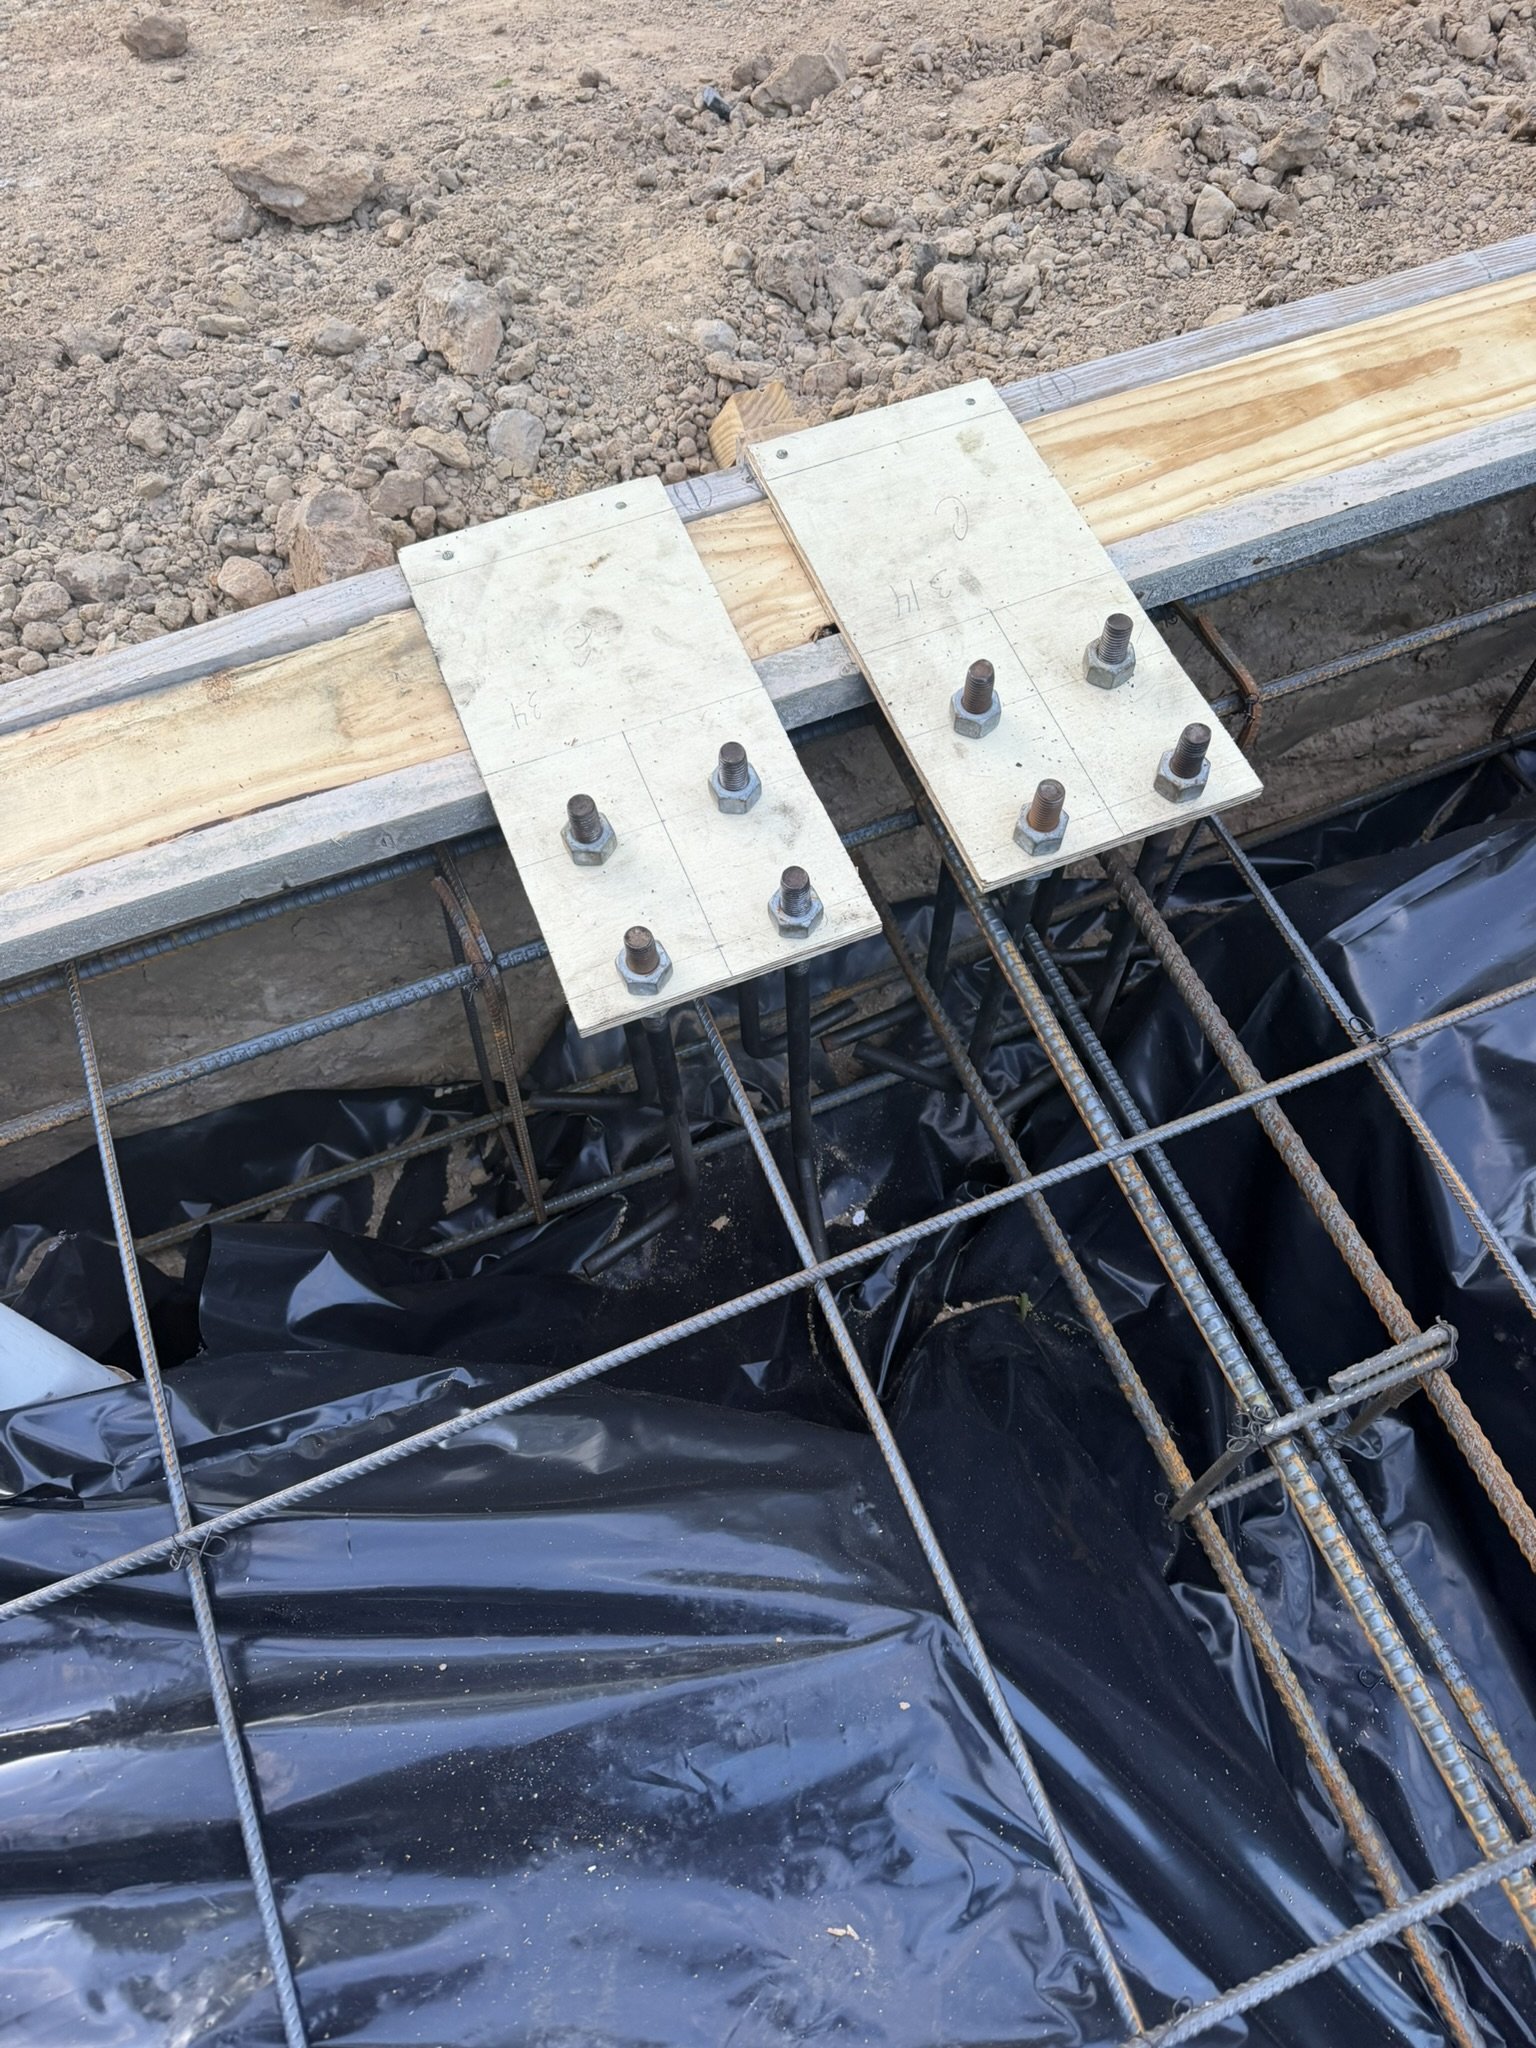
Some of the most interesting pre-pour work involves the anchor bolt assemblies. These are precisely positioned steel bolt clusters embedded in the slab that the building's steel columns will bolt directly onto. Getting their placement right — both the location and the height they protrude above the finished slab — is absolutely critical. A bolt even an inch off in any direction can mean costly adjustments when the steel package arrives.
Our anchor bolt templates (the plywood squares with the bolts poking through) are set to the column layout from the building manufacturer's drawings. You'll notice some have 4 bolts in a square pattern for the interior columns, while others have 2 bolts in a narrower configuration for perimeter conditions. Each cluster has to survive the concrete pour without shifting — they're held in position by the forms and by being tied back to the rebar grid.
The Forms: Giving Shape to the Pour
Surrounding the entire perimeter are the form boards — dimensional lumber set and leveled to define the exact edge and height of the slab. On a barndominium, this top edge of the form is typically your finished floor elevation, so it has to be dead-on level. The tape measure photos confirm the crew was checking dimensions repeatedly across the width of the beam trench and the height of the form.
The beam depth measurement — running the tape from the top of the form board down into the trench — shows approximately 24 inches of depth on the perimeter, transitioning to a shallower interior slab. This stepped profile is the defining feature of a monolithic slab and is what allows the same pour to function as both footing and floor.
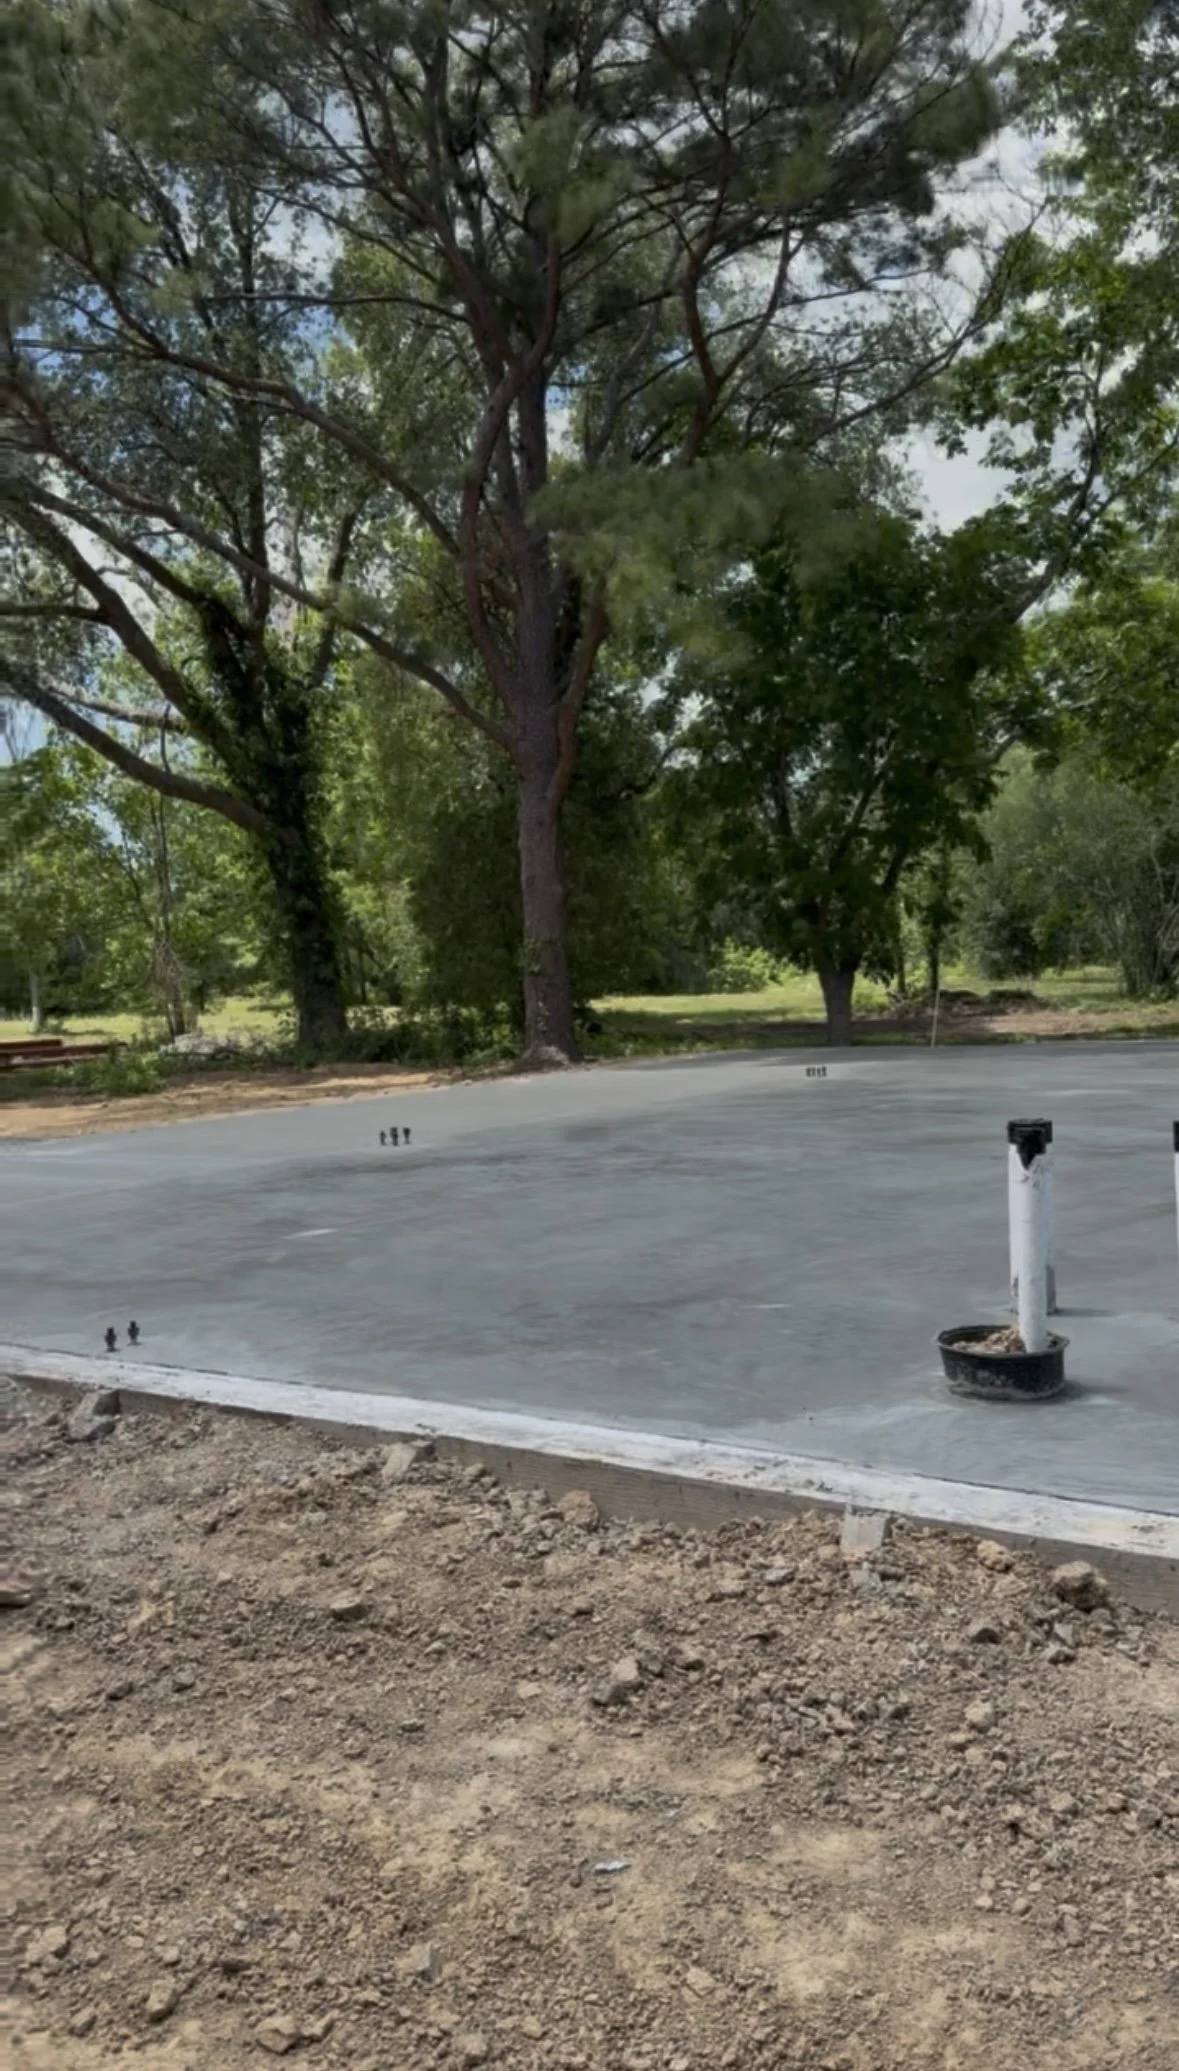
What Comes Next
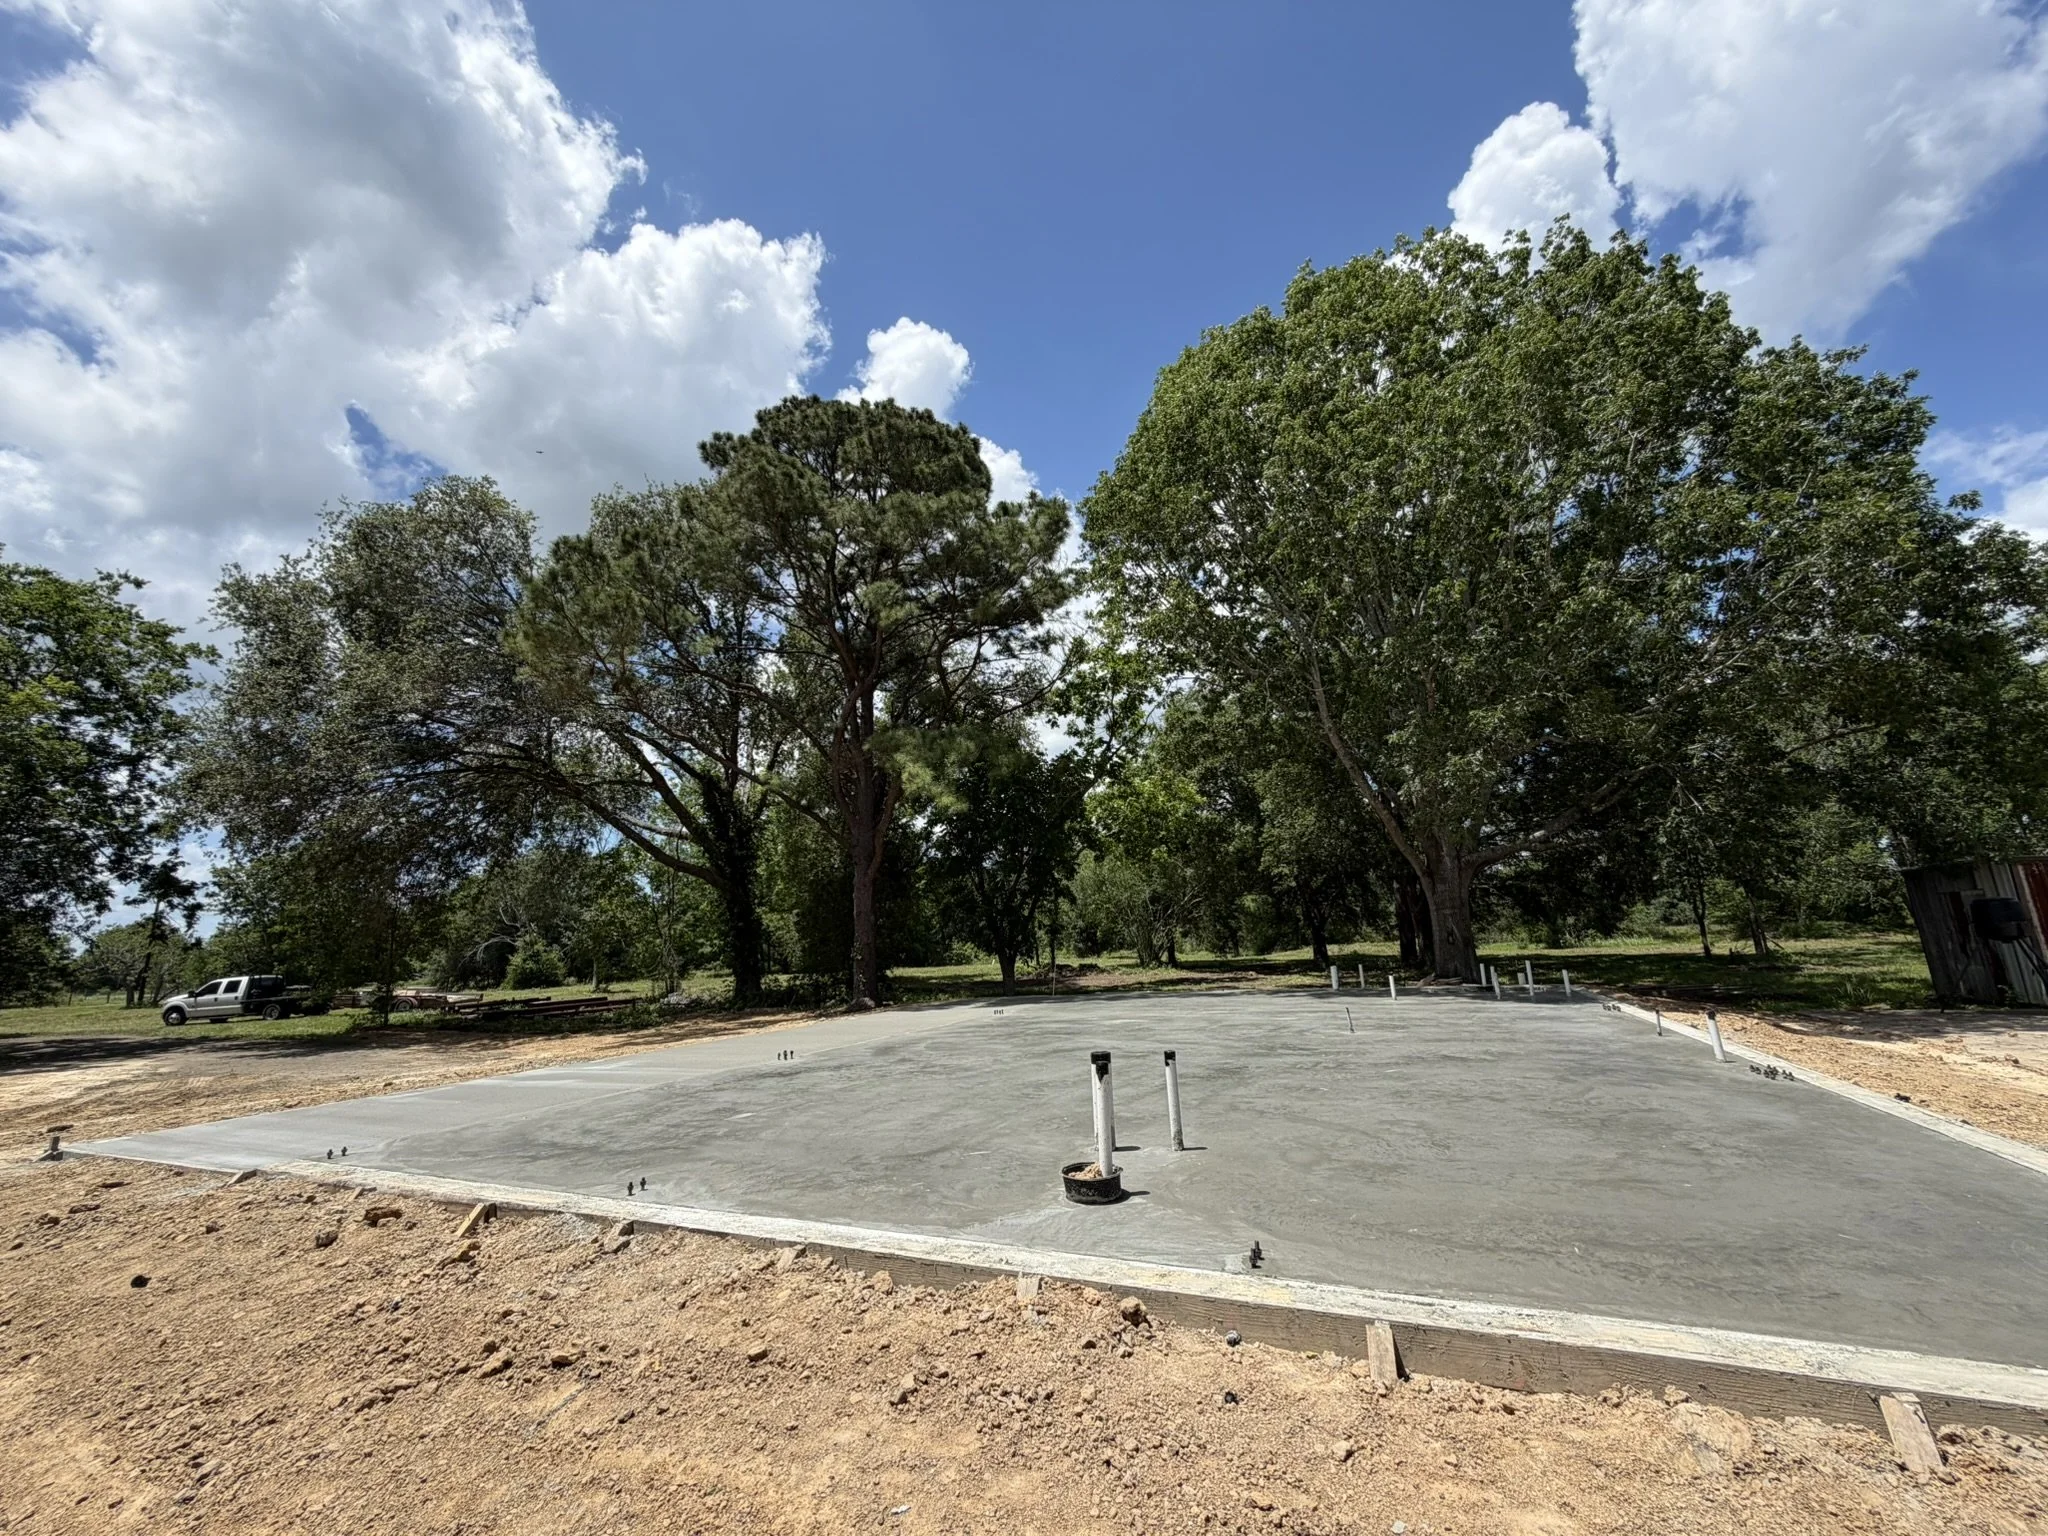
Once the inspector signs off on the pre-pour conditions, the concrete trucks arrive and everything that took weeks to set up gets covered in about four hours. The crew will place and screed the concrete, float it smooth, and then the long wait begins — 28 days for concrete to reach its design strength, though you can typically walk on it within 24 hours and begin light work within a week.
Those weeks of curing are a good time to coordinate the steel package delivery, line up your framing crew, and triple-check that your anchor bolt locations actually match the hole pattern on your column base plates. Ask us how we know that last one matters.
The slab is the part of the build most people never think about once the building goes up. But stand on a cold morning in a finished barndominium — a concrete floor that's crack-free, flat, and dry after years of Texas summers and freezes — and you'll know exactly what all that rebar and inspection was for. It's the part that makes everything else possible.